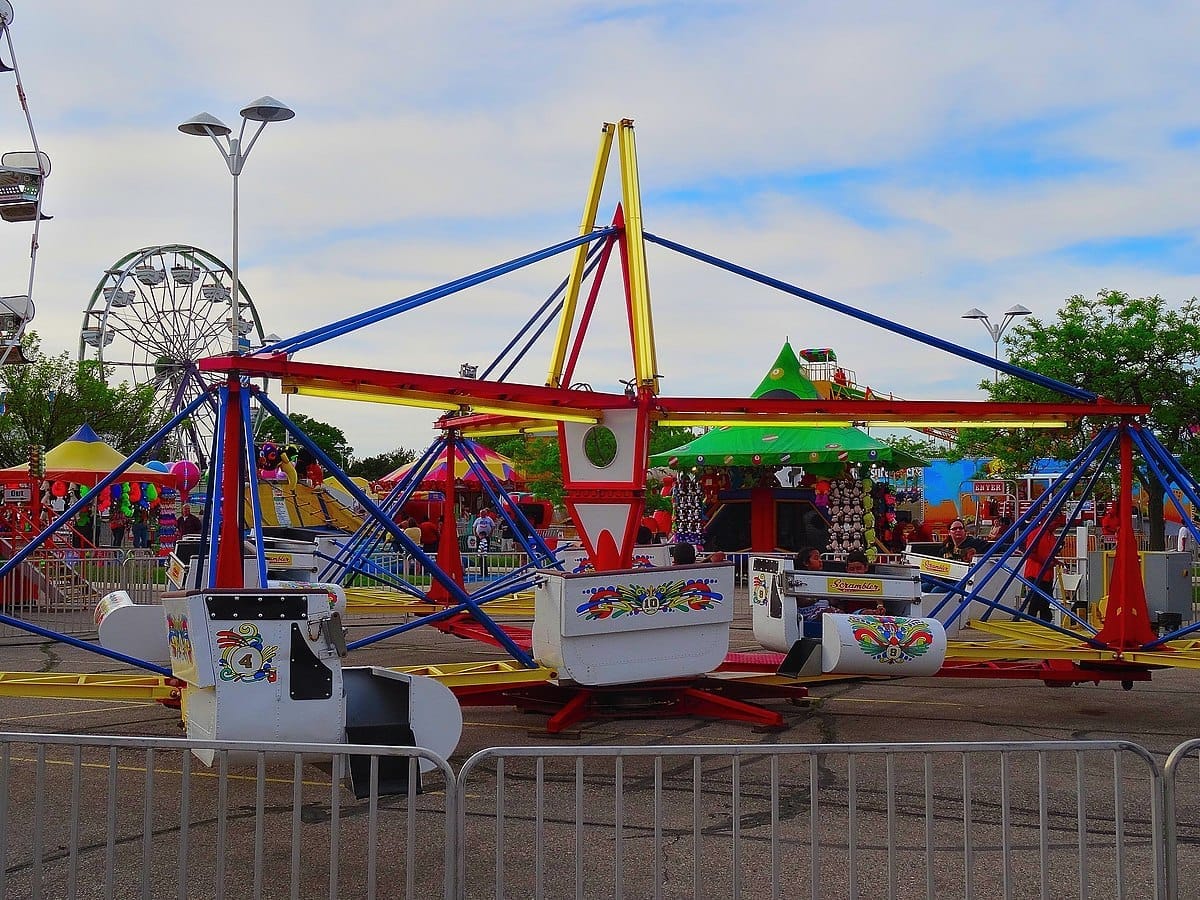
Amusement Odyssey
Holding it Together: Riveting of an Eli Bridge Scrambler Gondola
4,000 rivets... That is the alleged number of rivets on each gondola that I heard from a fellow Scrambler mechanic. Am I going to count them to verify that figure? No.
Scramblers have been around forever, with the first iteration being invented in 1938 by a man named Richard Harris (no, not the Pawn Stars guy). Eli Bridge Company picked up the rights, built a few prototypes, and has been producing the ride since 1955.
Admittedly, Scrambler rides are pretty simple from a mechanical standpoint.
However, most people would not believe me when I say that the gondolas require some of the most maintenance on the entire ride. The reason for this is those aforementioned 4,000 rivets.
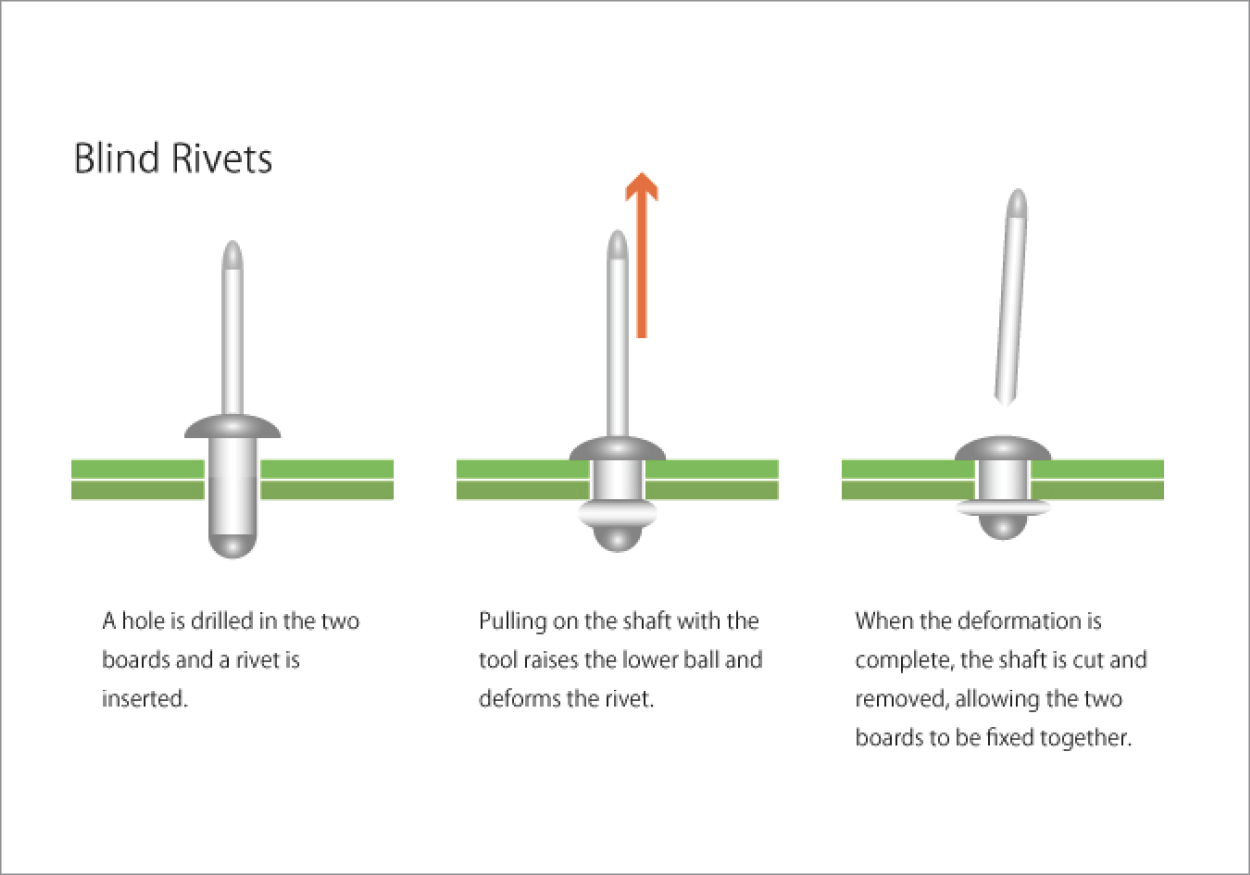
Scrambler gondolas primarily use 5/32" pop rivets to fasten aluminum components together. A standard pop rivet consists of:
A body (main fastener)
A head (holds it in place)
A mandrel (used for installation)
The riveting process involves inserting the rivet into a pre-drilled hole and using a riveting tool to pull the mandrel. This expands the rivet body, securing the components. The mandrel then snaps off, leaving a tight, permanent connection. However, this only works if the original hole isn’t oversized—if it is, the rivet won’t secure properly.
Other rivets used in Scrambler gondolas include:
Countersunk rivets for areas where parts may rub together
Solid rivets for securing threaded or fastening components
Huck rivets, composed of a collar and rivet, requiring a special rivet gun, particularly used in the foot tub
Construction
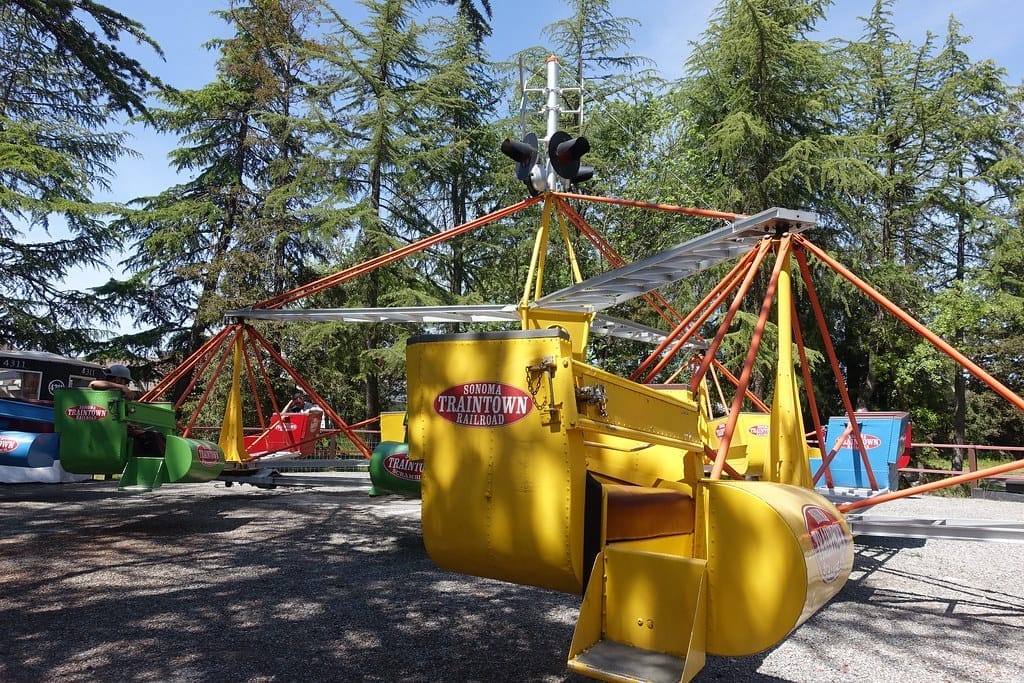
Scrambler gondolas use "stressed skin" aircraft aluminum for their bodies. Aluminum is a lightweight, easy-to-handle material with a great strength-to-weight ratio. Essentially the seat body is composed of three structural "ribs" and two "skins" covering the inside and outside of the gondola, creating a shell for riders to sit in. 5/32" or 3/16" rivets are used to mate the skins and ribs together, creating a strong body.
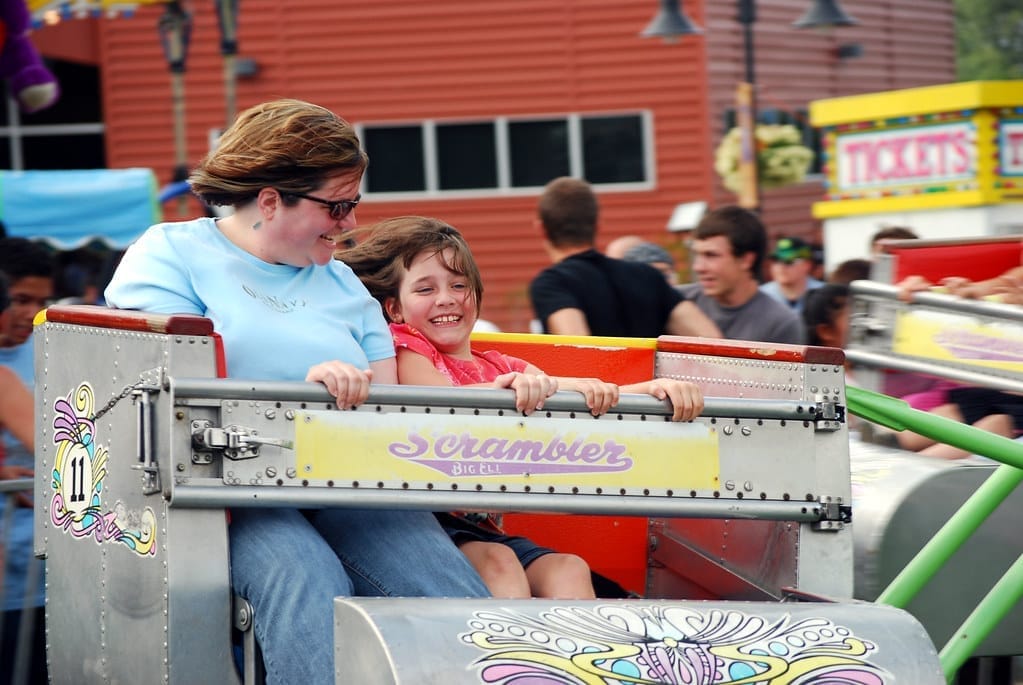
Coupled to this body is a foot tub, where riders step into the gondola and their legs rest during the ride cycle. A swinging door with a lap bar restrains riders and keeps them from standing up.
Sounds pretty simple right? The answer is yes, but there is a caveat. To replace any body component on the Scrambler requires some skill and patience. Unlike other rides that may use welds or fasteners to join components together, on a Scrambler each rivet must be carefully drilled out. Once a component is completely drilled out, a new aluminum piece can replace it. However, most of Eli's replacement parts do not come pre-drilled to proper size. They contain small pilot holes to help account for alignment, and considering all Scrambler gondolas are hand-built, there may be small deviations in the exact alignment of each part from one gondola to the next.
To rivet a new piece in, the pilot holes must be aligned to the existing gondola holes as precisely as possible, or rivets far down the line may not line up at all by the time you get there. It is also important not to oversize or "egg out" the existing holes too much by drilling off-center, as larger holes will not provide as much security or grip strength as a tightly-fitting rivet.
Major Components of a Gondola
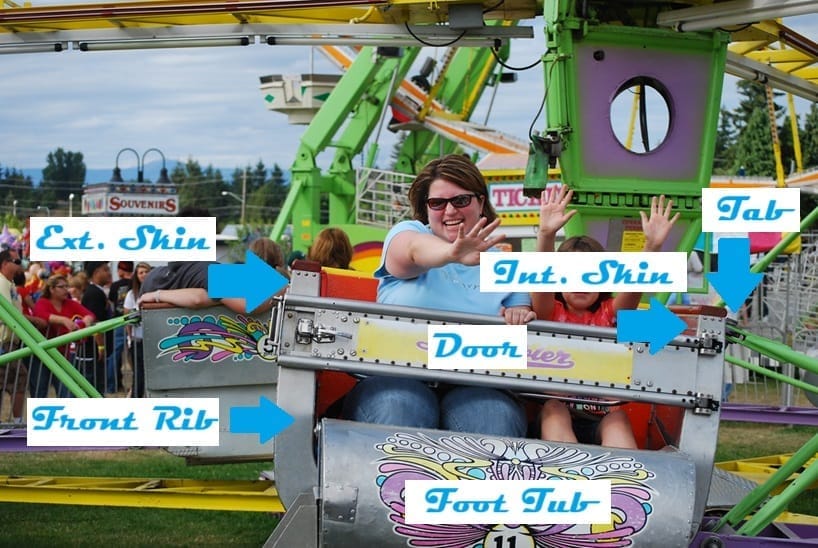
The Scrambler shell consists of some basic components:
- Front Rib: The front face of the gondola and one of the main structural members. It has holes drilled through it for the attachment of the door components. There is also a center rib and back rib, which serve the same structural purposes but are not as visible as the front.
- Exterior Skin: The outer shell of the gondola. It is one of two halves that "hold" the entire gondola together by fastening to the ribs. Out of all of the components on the Scrambler, it utilizes the most rivets and is one of the most difficult components to change. The exterior skin is usually painted or contains decals for decoration.
- Interior Skin: The inner shell of the gondola, which creates a seat body for riders. Usually the interior skin is only partially visible, otherwise covered by the seat pads and upholstery. Because it is constantly in contact with riders and the padding, it is one of the most vulnerable components to wear. Eli does offer repair patches for the most common areas to wear, in the corners of the skin.
- Mounting Tabs: The gondolas have three tabs, which have bored holes for the assembly pins to connect them to the seat sweeps. They are known as the top tab, front tab, and rear tab. A combination of threaded bolt holes and the clamp force created by the riveting helps to secure the tabs. Once a tab hole becomes 1/32" oversized (we measured them yearly), it is time to replace the tab or think about oversizing the pins. I have seen some parks utilize bolts instead of the genuine assembly pins from Eli. I don't know if there is any authority or approval in doing so, as it is likely just a cost savings means of not having to buy assembly pins from the manufacturer.
- Foot Tub: The portion of the gondola where riders feet rest. The foot tub is fastened to the gondola by two means: a set of bolted straps and two "air-loc" fasteners. Air-locs are most commonly used in the aircraft industry. As a quarter-turn fastener, it is a quick means of clamping the foot tub flat to the front of the gondola. There is a side step coupled to the foot tub with an air-loc as well.
- Door and Lap Bar Assembly: The door is the primary restraint mechanism for the Scrambler. It does contain a lap bar for grabbing purposes; however, the lap bar does not actually lock at all. As the door swings closed, a locking pawl passes over a "striker" and latches shut. As a secondary lock, Scramblers also contain a chained pin or what is known as a "California Latch." On one end of the door are two rubber bumpers that prevent the door from overswinging and slamming into the sweep tie rods. These bumpers do wear out quickly and have to be kept up on. The bumpers also will automatically shut any doors if the ride is started with an open door.
I could spend a whole day listing other components such as trays, trim blocks, other aluminum sheets, reinforcements, etc. The issue is that a lot of these components are internal or covered by padding/trim pieces, so without a picture or reference it is sort of impossible to do. Eli also does not provide technical drawings of their gondolas. We had a parts book and very simple hand-drawn illustrations to work with. Oftentimes, a piece would not be listed out in the book, and we had to send in pictures to get an answer from Eli. It's not so much that they are being secretive with their product, as they were one of the best manufacturers to work with for spare parts. It's more so that they are very old-fashioned with their business, and a lot of times parks or carnivals may not feel comfortable doing a certain gondola repair, and send it directly to Eli for major issues. Therefore, some parts are not commonly ordered as getting to them requires a lot of body work to do so.
Maintenance of Gondolas
The maintenance of the Scrambler gondolas is pretty straightforward. On a daily basis, it is a basic visual inspection of the condition of the seat. This includes making sure all rivets are present and tight, that the lap bar, door, and seatbelt mechanisms are functioning properly, and an overall check for cracks, holes, dents, etc. Day-to-day, the gondolas are usually not in need of major repairs or adjustments outside of normal wear.
Carnival models have the advantage of the gondolas coming apart partially each time they are moved around, and get more thorough inspection. For most parks, the gondolas get an annual overhaul, where the gondolas are taken apart all the way for a major inspection. This is where the majority of the body work and structural repairs are performed. Eli does not allow for any welding to be done on the gondolas themself, so any areas with holes or cracks require a complete replacement of that component. In specialized cases, there are approved patch repairs offered by Eli that can be used to double over any worn areas, saving the parks from tedious body work.
One thing to note is that any time a rivet is drilled out of the seat, its mandrel will fall into the inside of the gondola. The only way to get drilled rivets out of the seat is by drilling out one of the "top trays" on either side of the gondola and shaking or vacuuming out the remnants. You likely have heard this before on a Scrambler, where when the ride spins around, it sounds like a maraca shaking. This is caused by old rivets in the seat. We tried to keep up on this by emptying out the gondolas as repairs were done, but sometimes rivets got wedged or stuck far into the seat, and wouldn't come loose until later down the line. While not the biggest concern in the world, the rivets would slide around inside of the gondola, and over time could wear things out internally.
Eli came out with a service bulletin in 2019, where they required all gondolas over 35 years old to receive a borescope inspection. Because the deep internals of the gondola never really get a close visual inspection, Eli wanted to keep tabs on how the gondolas were holding up over time. They said to pay attention to two things in particular: corrosion and damaged rivet holes from oversizing after drilling. Aluminum gets this white, cloudy appearance when it corrodes, which looks a lot like a rough sheet of paper. If not protected, the aluminum will eventually get thin enough that it could crack or puncture. This is a major concern for gondolas, particularly in high-strength structural areas. We personally had an NDT company come in for our gondolas, and we drilled out the easiest area to get into, the same top tray that we drilled to get spent rivets out of the gondolas. The technician took pictures with the borescope of each gondola for submission and approval from Eli that they were satisfied with what they saw.
Replacement of the gondolas is a consideration for some parks and carnivals after decades of usage. I know of one Scrambler operator who sent a gondola to Eli for servicing after this bulletin. After being quoted a repair that was nearly the same cost as a completely new gondola, he decided to upgrade his gondolas. This price has very likely changed since then, but it was in the range of $80,000 for a set of 12, or just over $6,600 a piece. In the grand scheme of things, this is not a high cost for a completely new set of vehicles on a ride, however given that most Scrambler repairs can be performed by a qualified technician with moderate experience, many parks opt to just keep replacing body components as they go bad.
Changes Throughout the Years
Over the years, the gondolas have remained fairly consistent. Some materials have been changed for better durability. An example of this was the mounting tabs for the gondolas. Originally composed of aluminum, they had a tendency to wear out and even begin delaminating in layers, so Eli changed the tab material to steel.
Certain components on the doors, and lap bars have also been changed as they would dent or get worn through too quickly. Although modifications have been made, most repairs are simple to perform and not very time-consuming. For example, the State of California required Eli Bridge to develop a different style of door latch after an accident in the early 1970s. In addition to the normal door release latch, a chained pin also prevented the door from opening while in place. This would make it more difficult for riders (especially children) to unlatch the door and open the doors during the ride cycle. The notification for this upgrade states that all 12 gondolas can be updated to this new latch style in around 3 hours. In 2019, Eli also began offering a completely new style of secondary lock, a spring assisted pin which makes it nearly impossible to open the door while the ride is in operation.
Eli also began to offer updated reinforcements for the gondolas. For example, on the front rib of the gondola, there was a doubler plate in the high-stress corner of the gondola along with holes for the air-loc receptacles. The biggest issue with the air-locs was that if the receptacle became damaged, the entire front rib needed to be drilled out, a timely job. In the 1970s, Eli began to offer a new "front doubler" plate that placed the location of the air-locs below the gondola, fully accessible without needing to drill the front rib out.
Just because a modification or update is released does not mean a park must update immediately unless a safety bulletin requires it. For example, our Scrambler was on the older end of the spectrum, from the early 1960s, and we did not update to the new front rib style for many decades. Most mechanics who worked on the ride did not feel the need to put the work into that particular update. When I had the ride, I was sick of the labor required to fix a broken air-loc.
Ignorance was also bliss for many, as we had a couple of these parts in-stock, yet nobody wanted to do the research or reach out to Eli to figure out the installation procedure. I decided to do the modification on one of the gondolas just to see what it entailed, and I found out that it took less time to update the gondola than it did to replace a front rib completely. Over the next 2-3 seasons, we updated each gondola to the new style, prolonging the life of the air-loc mechanisms.
Stories and Thoughts
It was nice going through rehab and having a gondola that needed no body work. One time, I had at least half of our gondolas stripped down and rebuilt in under a day. We simply cleaned out the seats (sometimes there were some good treasures hidden under the seats), inspected the door assembly and re-aligned it to proper height, and took out the upholstery for repairs if needed. All of the Scrambler fasteners were pretty basic sizes and easy to assemble.
The issue with the threaded connections was that you had to be careful and delicate with them. Most of our hardware was stainless since it took very little loading, was not specified by Eli to be of a certain grade. We had one mechanic who loved using his impact driver on anything he could because it "saved time." The issue with this is that stainless hardware gets very hot very quickly when run down and "galls up." If you break off a bolt or strip out all of the internal threads, it is often required that you have to drill off parts of an entire skin to get to them and replace the assembly inside of the gondola. We also had a mechanic who did not understand the concept of thread pitch on a bolt or assembly lubrication. My first few years of having the ride, I had to go through almost every gondola to repair some type of threaded connection.
The hardest job I have done is replacing the exterior skin of a gondola. We discovered a puncture during our yearly rehab on the underside of the gondola. I think it was caused by a mechanic dropping it on the edge of a pump cart we used to take the gondolas off of the ride. Eli didn't offer a patch for this area, so we had to replace the whole skin. After drilling out hundreds of rivets, we fitted the replacement part to the gondola. Commonly, we tacked a couple of corners with rivets to sort of place the skin into the general area. A good practice when working with larger parts was to work the corners in first. Since the corners were the tightest-fitting connections, they had to be perfect, otherwise the whole piece would be askew.
I worked with one of my technicians for 2-3 days on this skin, carefully stretching it and aligning the holes along the way. Eli coiled the skin up in a cardboard box and sent it to us, making it very difficult to fit and get as flat as possible. After finally getting it all in place, we had to apply new decals to it as well and reattach all of the pieces for the latch assembly on the outside of the gondola.
We did a few front ribs as well once they wore down enough or even cracked. It was a lot of drilling/riveting, but not the worst job to do. One time we had one where Eli's pre-drilling was off by quite a bit. After 2 or 3 tries of getting the rib to fit right, we decided just to try a different one. It fit right in properly on the first try. Comparing the bad part to a different one, the pilot holes were off about 1/4". Unfortunately, since we already used the part, we could not return it and it simply turned into aluminum scrap.
We also did a few inside patches where the seat wore through. These were pretty straightforward and saved A LOT of work with drilling and riveting a new inside skin. One time, we had a mechanic who was too lazy to deal with about 100 rivets for a small hole he found in the gondola. Instead of using the patch from Eli, he cut out a scrap piece of aluminum and put 4 rivets through it to hold it in place. About a week later, he checked on his handiwork and found that his masterpiece had cracked right through the middle. So the gondola ended up getting tagged out for the season, and somebody more competent placed a proper patch in its place, straight from Eli.
It wasn't uncommon for people to drop stuff under the seat bottom. Scramblers are excellent at swallowing items. Normally they would remember what seat it was and inform the operator. To get the item back, maintenance would go out to the ride, undo the air-locs, and pull the seat bottom out. We got a call one night that somebody had lost a wallet on the ride, but they had no idea where. Normally we told the operators "tough luck" because at that point we would have to close the ride indefinitely until we found the item. However, one night the park director of operations essentially forced us to look since the guy couldn't drive without his license. Myself and one other guy spent the better part of an hour after park close looking for this wallet in the rain and pitch black darkness. We got through every gondola and didn't find a thing. The guest informed us that he thought he had lost it there, despite the fact he had ridden almost every ride in the park that they. We basically told him thanks for wasting our time and that it was a good idea to leave the park as quickly as possible. This is why parks announce that they "are not responsible for lost or damaged items."
A lot of parks opt to paint their gondolas. Personally, I think the gondolas can look good either way; painted or just the bare natural aluminum. Paint does offer the one advantage of being more resistant to corrosion, but any repairs or replaced rivets now need touch-ups or they would stick out. We had some trouble keeping our aluminum looking clean and polished. Eli recommended using this stuff called "Never-Dull" that was a polish meant for aluminum. It took forever to apply and only marginally made the gondolas look better. We tried using WD-40 with a polishing pad just to put some shine on the seats, but it only seemed to last a few days at a time. One season, we had a good chunk of spare time after the Covid-19 pandemic when our park was closed, so we spent some of that time detailing the gondolas. We used some very light grit abrasives to polish the skins really well, followed by Mother's aluminum polish. The gondolas were restored to their original almost-mirror finish. One of our long-term mechanics told me that one year, they acid washed the gondolas with muriatic acid, however that seemed very sketchy to us given how corrosive that chemical is.
Maintaining a Scrambler gondola isn’t the most glamorous job, but it’s a test of patience, precision, and craftsmanship. While a ride that has been around since the 1950s may seem simple, the reality is that keeping it in top shape requires dedication, skill, and a deep appreciation for good riveting.
